
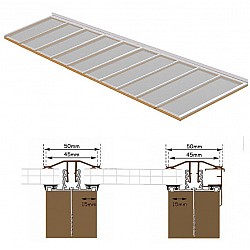
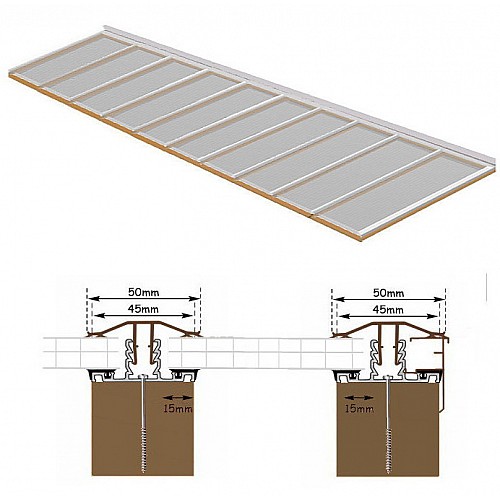
3.5m Long x 10m Wide Polycarbonate Roof Kit
- Brand: Master Plastics
- Product Code: OT3.5LX10
- Availability: In Stock
Timber Supported Polycarbonate Roof Kit – 10 Sheets
Select the type and colour of polycarbonate required when ordering.
This 10-sheet timber supported polycarbonate roof kit is designed for larger timber-framed roofing projects and includes the main components required to install the polycarbonate roofing system. The kit includes 10 x 1050mm wide polycarbonate sheets at 3.5m long, together with 11 fixing bars, edge bars, sheet closures, flash band and anti-dust tapes.
Suitable for lean-to roofs, canopies, porches and other timber-supported roofing projects, this kit provides a convenient way to order the principal roofing materials together.
What's Included
- 10 x 1050mm x 3.5m polycarbonate roof sheets
- 11 x 4m bars to fix to timber
- 2 x 4m edge bars
- 9 x 1050mm sheet closures
- 1 x 150mm flash band
- Anti-dust tapes
Installation Guide
Step 1 – Install the Edge Bars
Fix your first edge bar as shown in diagram 1. Slide the edge fillet into the groove on the bar and cut the bar to the required length, remembering to allow for a 50mm overhang into the guttering.
Cut the aluminium base 2mm longer than the intended length of the polycarbonate sheeting. This allows for the end cap to be fitted later.
Drill and fix the bar into position using No. 6 screws at approximately 300–400mm centres. Ensure the drip on the edge trim is correctly positioned and neat when viewed externally. Repeat at the opposite end.
Note: Where bars are butting against a wall, the edge trim is not required. Fit the bar only.

Step 2 – Fix the Centre Bars
You can either cut all the sheets to evenly space them across the roof or work towards having a sheet positioned in the middle. Once you have decided on the layout, start fixing the centre bars in the required positions.
Drill and fix the bars using screws at approximately 300–400mm centres.

IMPORTANT: Remember to leave a clear 4mm expansion gap between the bar and the polycarbonate sheets.
Step 3 – Check the Rubber Gaskets
Ensure all the rubber gaskets in the bars are flat with no bumps or raised sections before fitting the polycarbonate.
Step 4 – Prepare and Fit the Polycarbonate
Cut your polycarbonate sheets to length if they have not already been cut, ensuring that all swarf is removed. Use a vacuum or condensation-free air line to remove swarf. Never try to wash swarf out of the sheet.
Fit the anti-dust tapes to the sheet. Use the solid foil tape at the top of the sheet and the vented tape at the bottom. These tapes help reduce condensation and prevent insects and dust from entering the sheet channels, so ensure they are fitted correctly.
Peel approximately 50mm of the protective film down both sides of the sheet and position the sheet into place.
Step 5 – Fit the PVCU Caps
Position the PVCU caps so that the toothed legs locate inside the centre of the aluminium base. Press down firmly, then lightly hammer the caps into position using a rubber mallet or equivalent until they lock down.
As you work across the roof, complete the flashing as you go. Once the flashing is complete and all caps are in place, remove the protective covering.
Step 6 – Fit the End Caps and Sheet Closures
Fit the end caps into place. Cut the sheet closures to the required length between the bars and push them securely into position.

Installation Tips
Polycarbonate cut to size: Order your polycarbonate sheets after you have fitted the bars. We can cut, blow and tape your sheets to the correct width and length. Price on application. Remember to allow for expansion when ordering.
Lead flashing: If using lead flashing, fit it before the sheets and dress it down as you fit the roof panels. Fit the lead in sections of approximately 2m and seal the 100mm overlap with Lead Mate.
Cleaning: Only use mild soapy water. Try a small panel first to ensure there is no reaction. Never use solvent-based cleaners.
Silicone: You should not normally need to use silicone. If required, only use good-quality low-modulus neutral clear silicone.
Recommended sheet widths: For a good-quality roof that will last, avoid excessively wide sheets. Use recommended widths of 980mm or less for roofs up to 4m long and 700mm wide for roofs over 4m long.
Timber framework: Fix wall plates at the top and bottom and fix the joists as you install the polycarbonate bars.
Finishing the roof: Use 9mm economy fascia around the roof and square white guttering for a neat, maintenance-free finish.
10 Sheet Timber Polycarbonate Roof Kit
This 10-sheet timber supported polycarbonate roof kit provides the principal materials required for a larger polycarbonate roof installation. Choose the required polycarbonate type and colour when ordering.
Not sure which polycarbonate or roofing kit is right for your project? Email us and we are here to help.
Delivery Service
If you do not have personnel available for unloading the lorry, please select 2-man delivery in the options. This is a surcharge in addition to the normal delivery charge.